8 Steps For Crochet Maple Leaf Table Runner: A Beautiful Fall Table Decor Idea
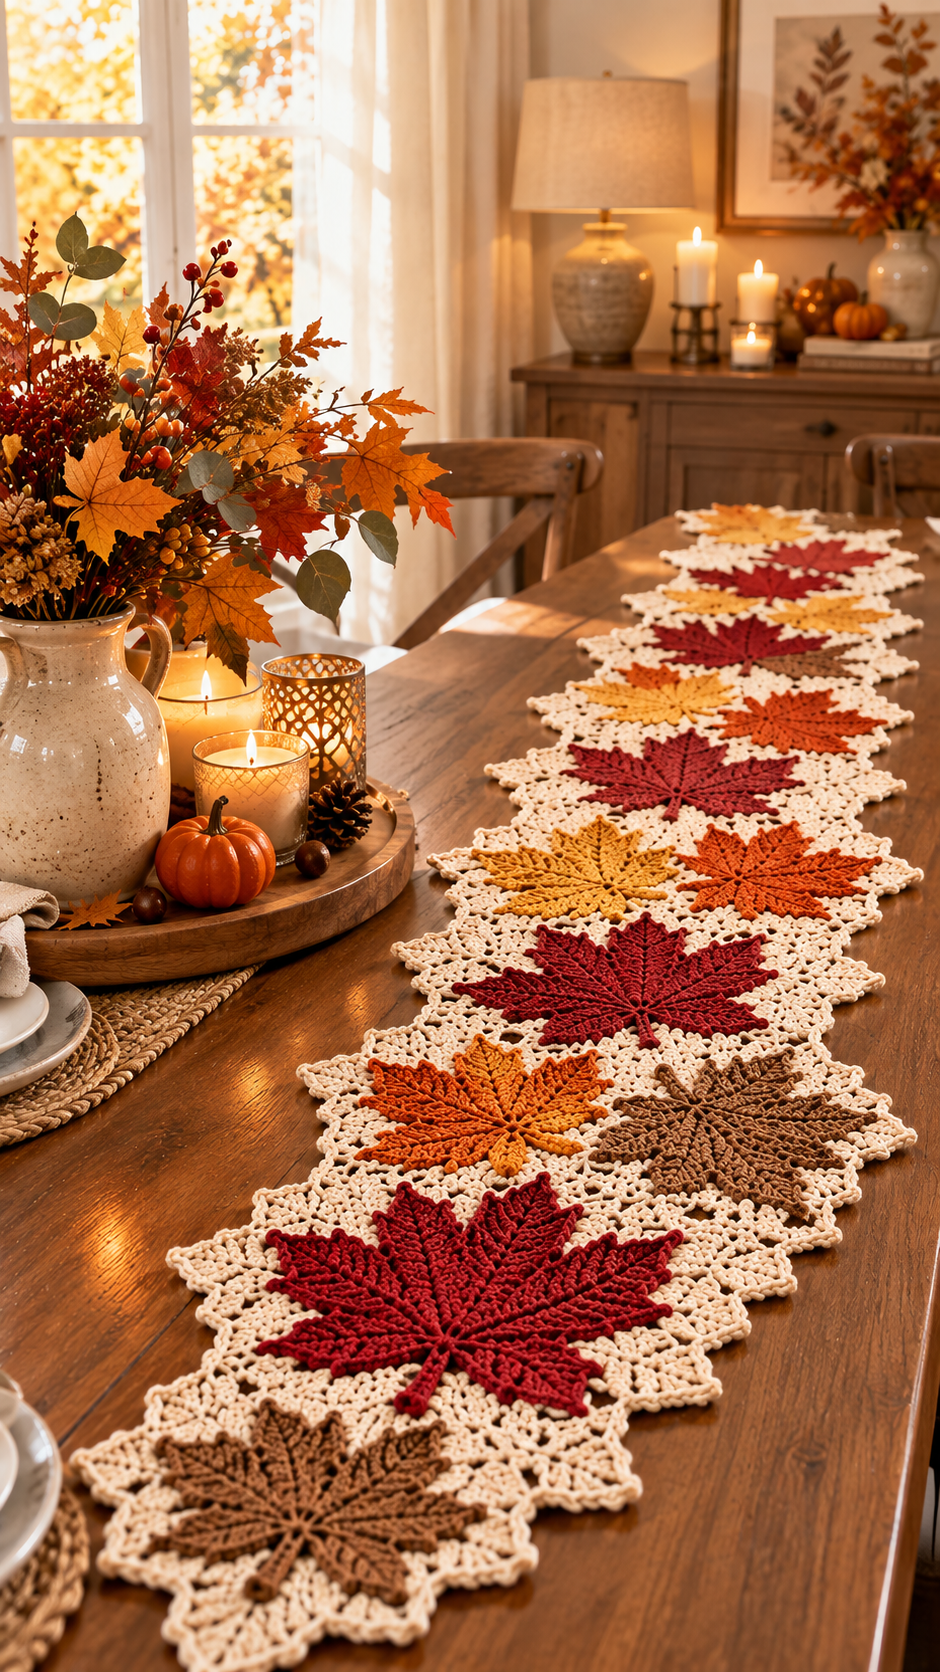
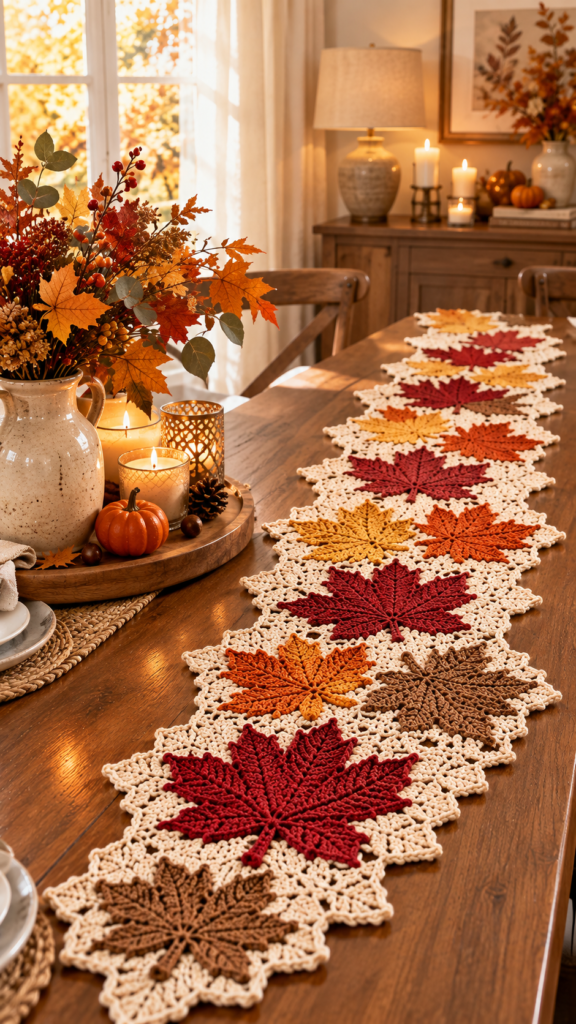
Crochet Maple Leaf Table Runner : There’s a specific kind of table decor that photographs so well it starts showing up in every algorithm you own — Pinterest, Instagram, your cousin’s group chat. A wooden table disappearing under a cascade of small, hand-stitched maple leaves in rust, mustard, and burgundy. It looks like it belongs in a farmhouse catalog, and it looks completely out of reach for a weekend project.
It isn’t. That’s the part nobody mentions upfront. This entire runner is built from one small, repeated shape — a single crochet motif made dozens of times in different colors, then arranged like a pile of fallen leaves. If you’ve ever finished a granny square, you already have the skill level this requires.
Here’s the full breakdown: what to buy, how to make the motif, how to lay it out so it looks intentional instead of random, and a few mistakes worth avoiding on your first attempt.
Table of Contents
At a Glance
- One repeated leaf shape, made 25-35 times for a standard-sized table
- Worsted (category 4) yarn works best; DK weight gives a daintier result
- Roughly 15-25 minutes per leaf once you’re past the first couple
- No joining required if you’d rather style leaves loose instead of stitched together
- Total project time lands around 8-12 hours, spread over however many evenings you want
Shopping List For Crochet Maple Leaf Table
Everything here is available at a standard craft store — nothing specialty, nothing hard to substitute.
| Item | Notes |
| Yarn | Worsted weight (category 4), 5-7 fall colors. Cotton keeps sharper edges; acrylic is the budget-friendly swap. |
| Hook | 4.0mm or 4.5mm — match to your yarn label |
| Tapestry needle | For weaving ends and optional joining |
| Scissors | Any pair you already own |
| Stitch markers | Optional — useful for tracking the five points per leaf |
| Glue or needle+thread | Only needed if joining leaves into one fixed piece |
Buy one extra skein of whatever color you’ll use most. This isn’t optional advice — you will run short, almost always on your main shade, almost always with several leaves left to go.
Before You Pick Up the Hook: Three Things to Know
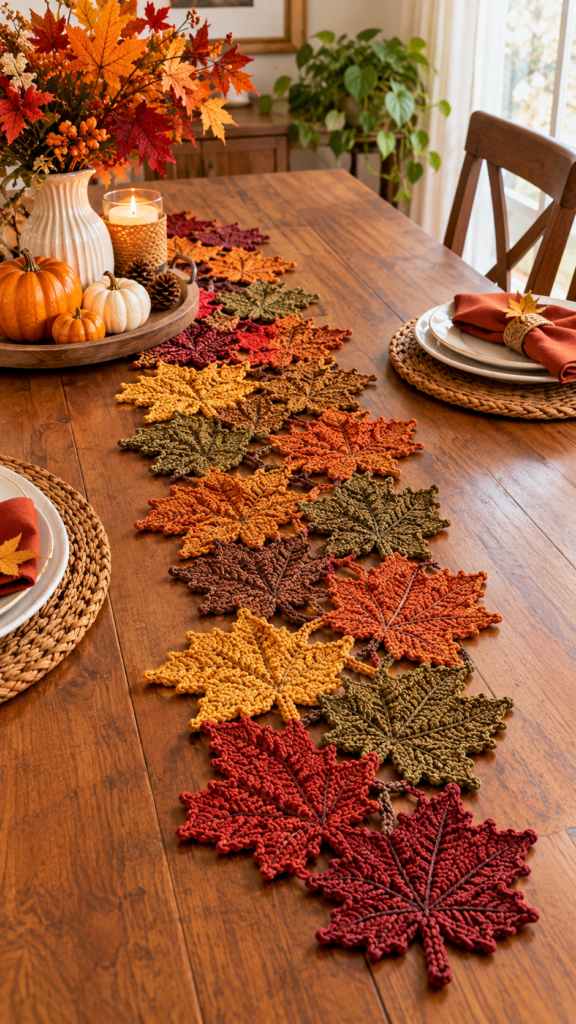
It’s supposed to look uneven. The visual appeal of this runner comes directly from mismatched color placement and overlapping leaves at slightly different angles. If you find yourself trying to make every leaf face the same direction or every color repeat on a schedule, stop — that instinct works against the design here.
Small pieces mean low commitment. Because each leaf is its own self-contained motif, a color decision you regret costs you one small piece, not hours of frogging. Test freely.
Your first leaf won’t be your best leaf. Treat leaf one as a fit check for your gauge and hook size, not a final product. Most people notice a visible jump in consistency by leaf three or four.
The Leaf Motif, Point by Point
A note on accuracy: the stitch counts below follow standard construction logic for a five-point crochet maple leaf. Your exact gauge, yarn thickness, and hook will shift the finished size slightly — this is true of any pattern, handwritten or published. Swatch one leaf before committing to a full batch.
Notation used: ch (chain) · sl st (slip stitch) · dc (double crochet) · tr (treble crochet)
Foundation Ring
Chain 6, slip stitch to join into a ring. Every point radiates outward from this center.
Two Small Base Points
Into the ring: ch 3 (as first dc), 2 dc, ch 2, sl st to close. Repeat once more for the second point. These sit at the bottom, framing the stem side of the leaf.
Two Mid-Height Points
Into the ring: ch 4, [dc, tr, tr, dc], ch 4, sl st to close. Work this twice — once per side — to build the leaf’s characteristic width.
The Long Center Point
Into the ring: ch 5, [dc, tr, tr, tr, tr, dc], ch 5, sl st to close. This longer stitch sequence is what gives the top of the leaf its elongated spike.
Stem
From the ring’s base, chain 6-8, then slip stitch back down. Small detail, big payoff for realism.
Finishing
Leave a 4-6″ tail, cut, pull through, weave in ends. A quick steam or light press flattens the leaf if you want a crisper lay-flat finish.
Crochet Abbreviations
This tutorial uses US crochet terminology.
| Abbreviation | Meaning |
| ch | Chain |
| sl st | Slip stitch |
| sc | Single crochet |
| hdc | Half double crochet |
| dc | Double crochet |
| tr | Treble crochet |
| st | Stitch |
| rep | Repeat |
| FO | Fasten off |
How to Crochet the Maple Leaf
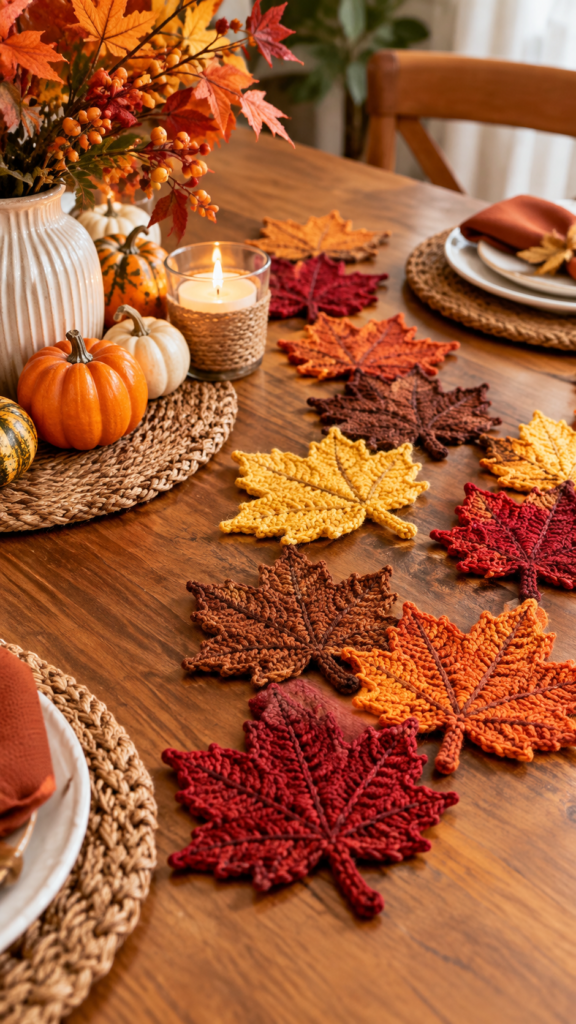
The beauty of this project comes from making individual maple leaf motifs and arranging them in a natural, overlapping pattern.
For a runner similar to the inspiration photo, I recommend making 12–14 leaves.
You can make all the leaves the same size or create a mixture of larger and smaller leaves.
Step 1: Make the Leaf Base
Choose your first autumn color for Crochet Maple Leaf Table.
Chain 8.
Starting in the second chain from the hook:
Sl st in the next stitch
Sc in the next stitch
Hdc in the next 2 stitches
Dc in the next 2 stitches
Hdc in the final stitch
You have created the beginning of the first leaf section.
Don’t worry if it doesn’t look like a maple leaf yet. The recognizable shape comes from adding the five pointed sections.
Step 2: Create the Five Leaf Points
The Crochet Maple Leaf Table needs a combination of short, medium and long points.
You will work five points from the same central base area.
Short Point
Ch 7.
Work back toward the base:
sl st, sc, hdc, hdc, dc, sc
Slip stitch into the central base.
Medium Point
Ch 9.
Work:
sl st, sc, 2 hdc, 2 dc, hdc, sc.
Slip stitch back into the base.
Center Point
This should be the tallest point.
Ch 11.
Work:
sl st, sc, 2 hdc, 4 dc, hdc, sc.
Slip stitch back into the base.
Fourth Point
Repeat the medium point:
Ch 9.
Work:
1 sl st, 1 sc, 2 hdc, 2 dc, 1 hdc, 1 sc.
Slip stitch into the base.
Fifth Point
Repeat the short point:
Ch 7.
Work:
sl st, sc, hdc, hdc, dc, sc
Slip stitch into the base.
You should now have a five-pointed leaf silhouette.
Step 3: Add the Stem
The stem is simple but makes a big difference.
From the center base:
Ch 6.
Slip stitch back along the chain toward the leaf.
Slip stitch into the base and fasten off.
Leave a yarn tail long enough to help with joining later.
Step 4: Add the Raised Leaf Veins
This is one of the easiest ways to make your crochet leaves look more detailed.
Thread a tapestry needle with approximately 12–16 inches of matching yarn.
Starting at the bottom center of the leaf, sew a line toward the tip of the longest point.
Repeat the process toward the two medium points.
You can also add short veins toward the smaller outer points.
These raised lines create the textured appearance of real leaf veins and help the motifs resemble the dimensional leaves shown in the inspiration photo.
Step 5: Make Your Autumn Leaves
Now repeat the leaf pattern in several colors.
For a medium table runner, try:
3 burnt orange leaves
3 rust leaves
2 mustard leaves
2 golden brown leaves
2 deep burgundy leaves
For an especially rich autumn appearance, don’t arrange the colors in a predictable repeating sequence.
Instead, scatter the colors throughout the runner.
This gives the finished piece the appearance of naturally fallen autumn leaves.
🍁 Step 6: Block Each Leaf
Don’t skip blocking.
Freshly crocheted leaves can curl at the edges, particularly around the narrow points.
Lay each finished leaf flat on a blocking mat or a clean, dry towel.
Gently stretch the five points into shape and pin them.
Pay special attention to:
The center point
The two medium points
The outer points
The stem
The center vein
Lightly mist the leaves with water and allow them to dry completely.
Blocking is commonly recommended for crochet runners and leaf motifs because it helps establish the intended shape and allows the finished piece to lie flatter.
Step 7: Arrange the Table Runner
Before sewing anything together, place all your leaves on the floor or a large table.
This step gives your project its beautiful, dimensional layered look.
Start with three or four leaves in the center.
Add additional leaves toward each end.
Allow some leaves to overlap slightly.
Try different directions:
🍁 One leaf pointing left
🍂 One pointing right
🍁 One pointing toward the end of the table
🍂 One angled slightly upward
Avoid creating a perfectly straight row.
The slightly irregular arrangement gives the runner a more natural fallen-leaf effect.
Step 8: Join the Leaves
Once you’re happy with your arrangement, connect the leaves.
You don’t need to sew around the entire edge of every leaf.
Instead, use a tapestry needle and matching yarn to secure each leaf at several strategic points.
Good joining locations include:
Near the leaf base
Along one side
Near an overlapping section
Near the opposite side
Keep some edges free.
This allows the individual leaves to remain slightly raised and creates the layered texture that makes the runner visually interesting.
Laying Out the Runner
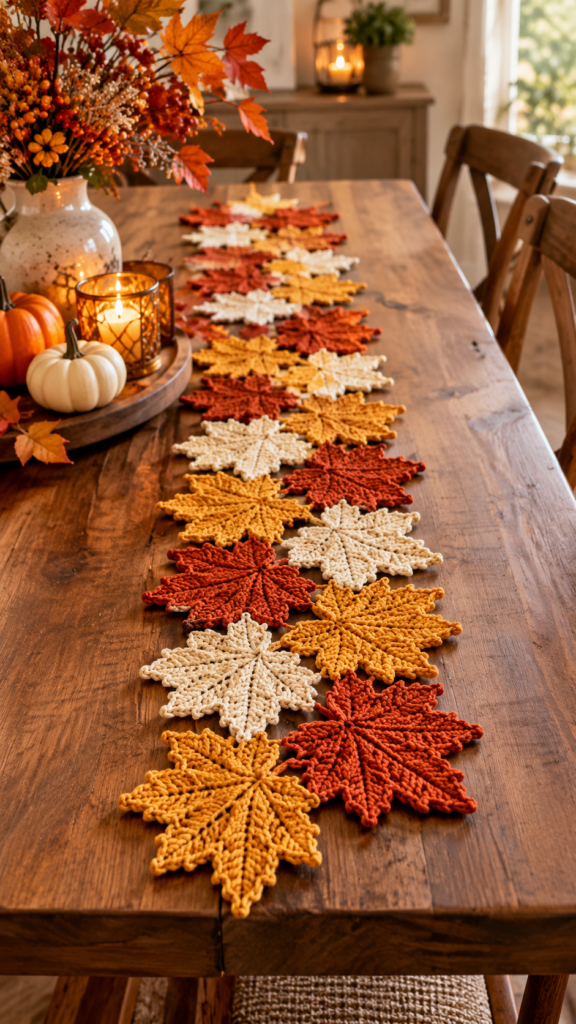
Skip straight to gluing or stitching and you’ll likely regret it. Lay everything out loose first.
Spread all finished leaves on the actual table, roughly in the shape you want the runner to take.
Break up any color clusters — if you made four burgundy leaves, separate them rather than grouping them together.
Overlap each leaf by about a third over its neighbor. This is what closes visual gaps and creates the cascade look.
Once you’re happy with the arrangement, tack overlapping points together with a few whip stitches using a tapestry needle and matching yarn.
Let the ends narrow naturally — smaller leaves, less overlap, tapering toward each tip of the table.
Common Mistakes (and Quick Fixes)
Leaves look flat and papery: steam-block them lightly after finishing; this relaxes the stitches and helps the points lie open.
Runner looks too “matchy”: you likely repeated colors in sequence. Shuffle leaves and rearrange before joining anything permanently.
Center point curls instead of standing tall: often a tension issue on the tr stitches — loosen your grip slightly on that longest point.
Running out of yarn mid-batch: covered above, but worth repeating — buy the extra skein early.
Styling the Table
The runner carries most of the visual weight on its own, but a few additions round out the look:
A textured stoneware vase with dried branches or wheat stems as the anchor point
Mini pumpkins in mixed neutral tones, grouped off-center
Amber or smoked-glass candle holders for warm light
A stray pinecone or two — free texture
Keep decor clustered toward one end of the table rather than spread evenly, so the runner stays the focal point instead of competing with it.
FAQ
Are any special or advanced crochet stitches required for this project?
No — the whole motif uses standard stitches most beginners already know: chain, slip stitch, double crochet, and treble crochet. There’s no complex charting involved, just repeating the same short sequence five times per leaf.
How many crocheted leaves will I need to decorate my table?
25-35 leaves generally covers a standard 6-foot table with good overlap. Smaller tables or accent pieces look complete with 10-15. Making a couple extra costs little and saves you from an awkward gap during layout.
Can I skip sewing the leaves together entirely?
Yes. Loose leaves give you full control to restyle the arrangement anytime, which is useful around a rotating centerpiece. Joining them is really only necessary if you want to lift and store the runner as a single object.
What if I want a smaller, more delicate version?
Drop to a DK weight yarn with a 3.5mm hook. You’ll get a noticeably smaller, lighter leaf — good for a table scarf, a wreath, or even garland instead of a full runner.
Roughly how long will the whole project take me?
Figure 15-25 minutes per leaf once you’re past the learning curve. A 30-leaf runner lands around 8-12 hours total — very doable across a couple weeks of evening sessions rather than one long sitting.
Worth Making
This is the kind of project that rewards patience over speed. Nobody needs to rush it — the leaves stack up naturally over a few evenings, and the finished piece earns its spot on the table every fall from here on out.
Start with one leaf tonight. The rest builds itself from there.